Using a squat rack for hip thrusts is a great way to improve stability and safety when doing this glute-buster of an exercise. Here’s how to use a squat rack for hip thrusts for maximum gains.
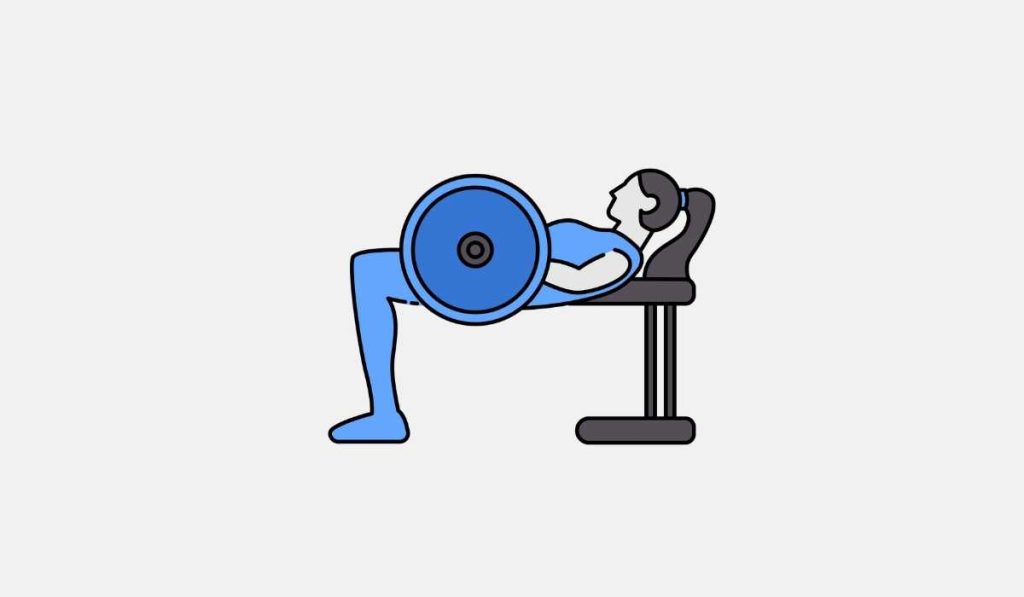
Hip thrusts are one of my all-time favorite exercises for developing glute and leg strength.
And one of my preferred ways of performing the exercise correctly is by using a squat rack.
In this guide, we will cover everything hip thrust-squat rack related, including:
- Key benefits of hip thrusts
- Why the squat rack is a great way to do the exercise properly (and safely)
- How to set up the rack for hip thrusting success
If you are looking for a way to stack up reps of hip thrusts with a rack, you’ve come to the right place.
Next stop: Glutetown!
The Hip Thrust – Overview
Before we get into the “how”, I want to take a moment to talk about the “why” and “what”.
First off, what are hip thrusts?
Hip thrusts are a glute-focused exercise that engage your core, hips, glutes, and hamstrings to develop strength between your core and lower body.
All of these muscles worked in hip thrusts also work together every time you move your legs to bend, squat, lunge, jump, run, and cycle.
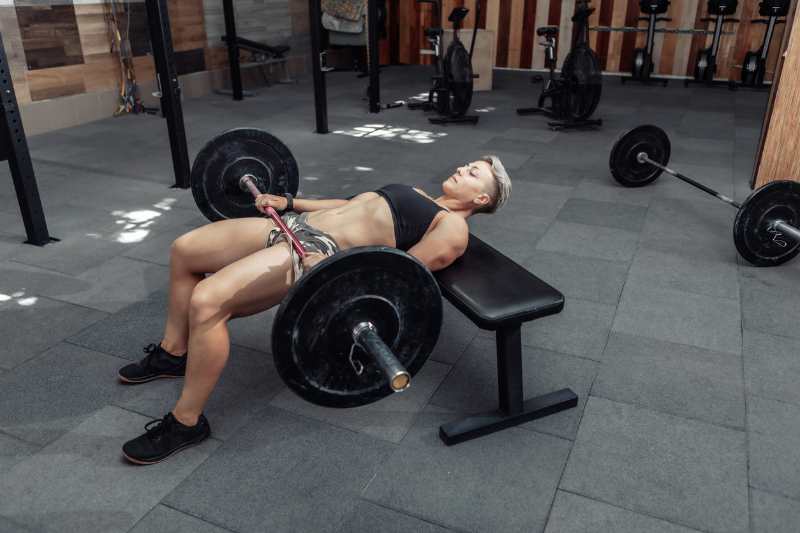
Hip thrusts specifically target these lesser-utilized leg muscles to build strength, which in turn translates into better performance on big lifts like squats, deadlifts, and lunges.
There are a lot of benefits of hip thrusts, including:
⭐ Improved Posture
By strengthening the muscles mentioned above, you’ll facilitate better posture in your back and lower body.
You’ll feel less strain on your back, hips, and butt any time you spend long hours standing, you can combat the tightness that results from long hours of sitting, and you’ll find it easier to stand and sit upright.
⭐ Reduced Injury Risk
Hip thrusters train not only your hips and glutes, but also your lower back. By working these muscles together, you create a more stable union between the spinal supporters and lower body muscles. Greater stability and strength means less risk of injury across every activity and sport.
You can move more easily trusting your muscles have the strength to support your spine, preventing lower back strain.
⭐ Better Squat Performance
Your glutes and hamstrings are the “antagonist” muscles to your quads. What this means is that they work in opposition to your quad muscles.
Your quads push you up from the squat, but it’s your glutes and hamstrings that allow you to slowly lower under control into the squat. When you lunge, your quads push upward, but your hamstrings and glutes lower you into the lunge.
Developing strong antagonist muscles ensures better performance across all leg exercises.
⭐ Better Pelvic Stability
Our pelvic muscles are critical for a wide range of activities and movements, everything from running to bending/straightening to jumping to clenching.
Under-training these muscles can lead to a higher risk of injury, not to mention compromise the stability of your pelvic region and the connection between your pelvis and back and legs.
Training your pelvic muscles will drastically increase strength across your entire core and lower body.
⭐ Run Faster
Yes, that’s right: training your glutes and hamstrings will help you to run faster.
These posterior chain muscles are the ones responsible for swinging your leg forward with every step, and they even play a role in lateral (side-to-side) movement.
By strengthening them, you enable faster movement, greater resilience against damage, and speedier recovery times.
Benefits of Using a Squat Rack for Hip Thrusts
Most people tend to do hip thrusts using a simple weight bench and a barbell placed directly on the floor.
While this is the easiest solution, I’d argue that it’s not the best.
Doing hip thrusts with a squat rack or power rack can take the effectiveness up a notch, give you greater control over your movement, and facilitate better stability.
Here are some reasons that you should start doing hip thrusts this way:
1) No sliding.
If you’re just leaning on a weight bench, there’s a very real chance that with the combined weight of your body and barbell, you’ll push the bench slightly backward with every rep.
Over a full set, you may end up sliding a significant amount, which will compromise your form and put your lower back at risk.
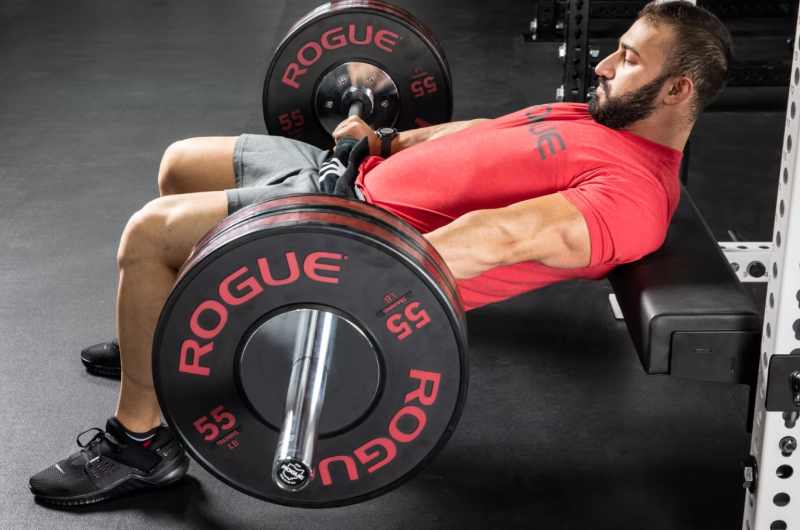
But with the squat rack, there’s nowhere to go and no chance of sliding. It’s guaranteed to keep your bench firmly in place no matter how heavy you lift.
2) Easier setup.
With a barbell placed directly on the floor, the setup can be a bit tricky.
You have to sit on the floor, roll the loaded barbell onto your lap, try to slip the hip thrust pad in place between your legs and the bar, and only then can you get lifting.
On the other hand, if the barbell is racked off the ground, you can just get under it and un-rack the weight with one smooth movement. It’s so much easier to set up and execute!
3) Better depth gauge.
When doing hip thrusts, it can be hard to know exactly how deep to go.
Do you lower until your butt touches the ground, or do you stop part of the way down? The pins or safety bar of the squat rack make it much easier to figure out the ideal depth.
All you have to do is stop lowering before the barbell hits the pin/safety bar.
You’ve got more control and a better gauge of the ideal hip thrust depth.
How to Set Up the Squat Rack for Hip Thrusts
There are a couple of ways you can set up your squat rack to do hip thrusts:
1) Bench in front of the rack.
This isn’t the best way to do hip thrusts on a squat rack, but it may be your only option if you’re working with a 2-post squat rack (not a 4-post power rack).
With this setup, you’ve got the bench placed directly in front of the rack, so your shoulders are leaning against the bench and your lap is right beneath the level of the racked barbell.
You’ll want to place something heavy against the bench (such as weight plates or kettlebells) to stop it from sliding backward.
2) Bench leaning against the rack.
Again, this is a less-than-ideal but acceptable solution if you’re working with a 2-post squat rack. Placing the bench against the rack will stop it from sliding backward, keeping you stable while you lift.
However, you’ll have to place the barbell on the floor, which makes for a trickier setup when trying to load the weight on your lap.
3) Hip thrust bar connected.
Now we’re getting somewhere!
Some squat racks and power cages come with their own hip thrust bench/bars—for example, the Rogue Monster Hip Thruster bench/bar—that you can connect to facilitate hip thrusts without needing to use a bench.
You’ll still have to place the barbell on the ground, but at least you’ve got a solid, stable platform for hip thrusts.
4) Safety bars installed.
I’m going to go ahead and call this the “ideal” setup for hip thrusts using a squat rack.
With this setup, you’ve got the loaded barbell resting on the safety bars, which are set up to the right height so that you can easily get under them to un-rack the weight.
You’ve also got a hip thrust bench/bar or a weight bench securely emplaced and pressed against the squat rack’s posts so it can’t slide anywhere.
The safety bars serve as both the rack and the depth gauge—all you have to do is stop lowering before the barbell hits the safety bar!
How to Do Hip Thrusts with a Squat Rack (at Home)
For home gyms, there are quite a few options for how you can set up to do hip thrusts properly and safely.
Below are two quick photos of how we do hip thrusts at home.
These examples are by no means exhaustive, and there are plenty of different configurations you can use depending on the equipment you have and how tall/short you are.
Here are the two most common ways that my wife and I (and our spotter Beau, who is fantastic at licking forehead sweat) do hip thrusts with our power rack at home:
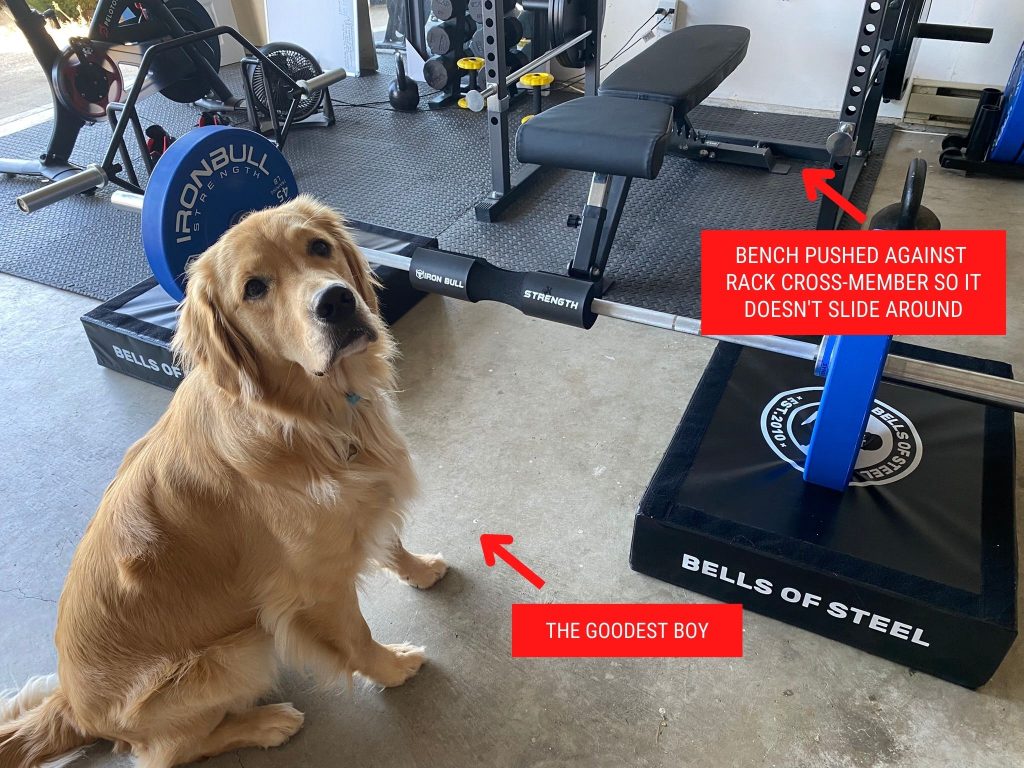
In the example above, I’m solely using the squat rack as a support for my bench.
I’ve pushed the bench even further back and used the safety arms to hold the barbell off of the ground as well, but this particular rack isn’t bolted down, so I prefer to play it conservatively when loading safety arms outside of the rack.
The crash pads–the Bells of Steel Lifting Pads–allow me to sneak my legs under the barbell.
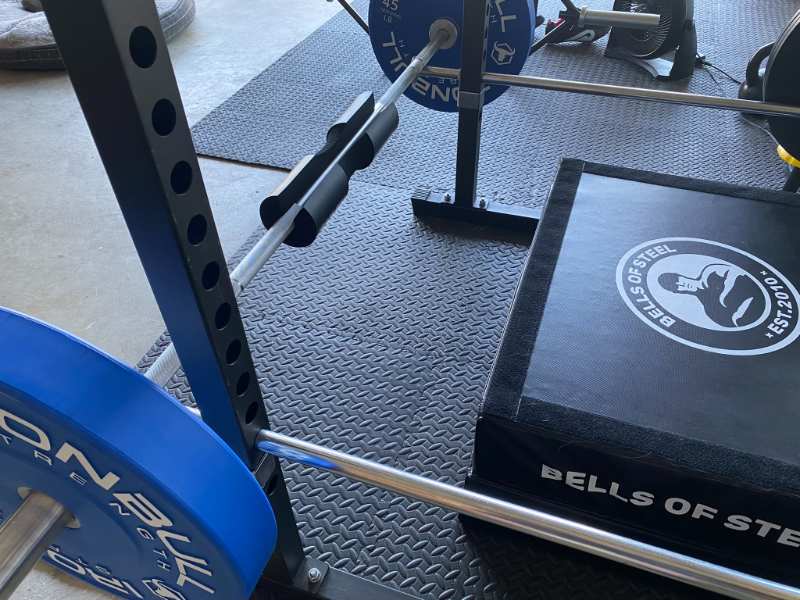
In this example, set up for my wife who is shorter, she can slide under the barbell and use the catches on the front of the rack as a launching point.
The perks of using the rack–and more specifically, the safety catches–in this instance are that you can load and unload plates quickly and easily as the barbell is elevated off the ground.
The crash pads, serving as a hip thrust bench, are backed up against the cross-member, keeping them in place and reducing that pesky (and potentially dangerous) sliding off the bench.
How to Do Hip Thrusts Using a Squat Rack
Now that you’ve got the squat rack set up (using the above suggestions), it’s time to get lifting!
Here’s the step-by-step process for doing hip thrusts using a squat rack:
Step 1: Set up the weight. Load the barbell with your desired weight. Start off with a lighter load so you can focus on mastering the form and specific movements. Too much weight right off the bat will increase the risk of lower back injury.
Step 2: Set yourself up. Rest your upper back and shoulders against the bench, and roll the barbell (on the floor or safety bars) so it’s directly above your lap. Place the hip thruster pad in your lap beneath the barbell.
Step 3: Unrack the weight. Raise your hips off the ground and press the pad against the barbell. The weight should be resting in the crease of your hips. Use the power of your hips, glutes, and hamstrings to lift the weight off the rack.
Step 4: Thrust. Exhale explosively as you thrust your hips toward the sky. Lift until your torso forms a table, with a flat back and belly, your knees bent to a 90-degree angle.
Step 5: Lower. Lower slowly and control your descent to focus on the eccentric phase of the movement. Your core will engage along with your glutes, hamstrings, and hips. Inhale as you lower.
Step 6: Stop. Stop just before the barbell makes contact with the safety bar, or just before your butt touches the floor. Pause at the bottom for a 1-count, then thrust upward again. Repeat as desired.
Squat Racks and Hip Thrusts — FAQs
Should I do hip thrusts or squats first?
Squats are the bigger lift, recruiting larger muscles and utilizing more energy.
You should always start your workout with the big lifts, then incorporate the smaller lifts (smaller muscles, less energy expended) at the end.
Because the CNS demand is significantly greater with squats, I’d highly recommend doing them first when you are still fresh and can really pile-drive energy and focus into some big numbers.
What other machines can I use for hip thrusts?
Hip thrusts can be trained in a variety of ways, using a range of resistance tools. Resistance bands and dumbbell hip thrusts are popular.
There are dedicated machines for hip thrusts as well as other machines at the gym you can use to do hip thrusts in a controlled manner, including:
- Hip thrust machine. This is a machine specifically designed for the hip thrusting movement, using a bench connected to bars you can load with weight. There are also some glute drives on the market, but they are mostly found in commercial gyms.
- Leg extension machine. Although designed for leg extensions, you can adjust the arm and the leg roller so that it acts as a de-facto glute drive. Slid under the roller, use the seat pad as a back rest, and off you go.
- Smith machine. The Smith machine is essentially a barbell secured to a sliding rail, so you can easily set it up for hip thrusts.
The Bottom Line
Hip thrusts are one of the best exercises to include in your Leg Day workout.
Because the glutes and hamstrings are antagonists to the quads, it’s imperative that you train them in order to build the strength necessary to support your quads on the bigger, heavier lifts like squats and lunges.
Using the power rack at the local gym or in your garage gym is a great way to increase your ability to perform this exercise properly and safely, ensuring that you are spending the most time possible chasing those big booty gains!
More Guides and Articles Like This
5 Best Squat Rack Exercises for Glutes (and Benefits of Glute Training with a Rack). Ready to take your glute workouts to the next level? Here are the best glute exercises you can do using your squat rack.