Lever arms are one of the most versatile attachments you can add to your squat rack. Here are eight of the best exercises you can do with lever arms, the benefits of using them, and rack brands that offer them.
Buckle up Buckeroo—it’s time to take your training to the next level!
Adding a set of lever arms to your power rack or squat rack can be an amazing way to increase the versatility of your home gym, and offers even more exercises to do in a brand new—and highly effective—way.
In this article, we’ll take a deep dive into lever arm training, looking at what lever arms are, why you should use them, and which are the best exercises to do using lever arms.
By the end of this post, I’ve got no doubt you’ll be seriously considering these power rack attachments as the next upgrade to your home gym.
Let’s get to it.
What is a Lever Arm?
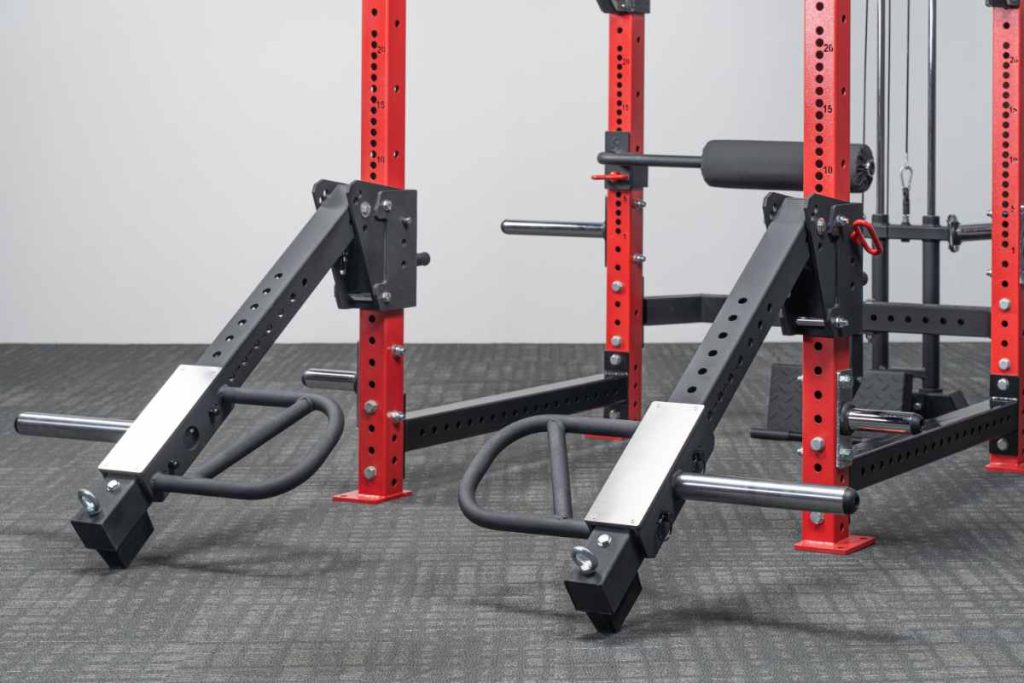
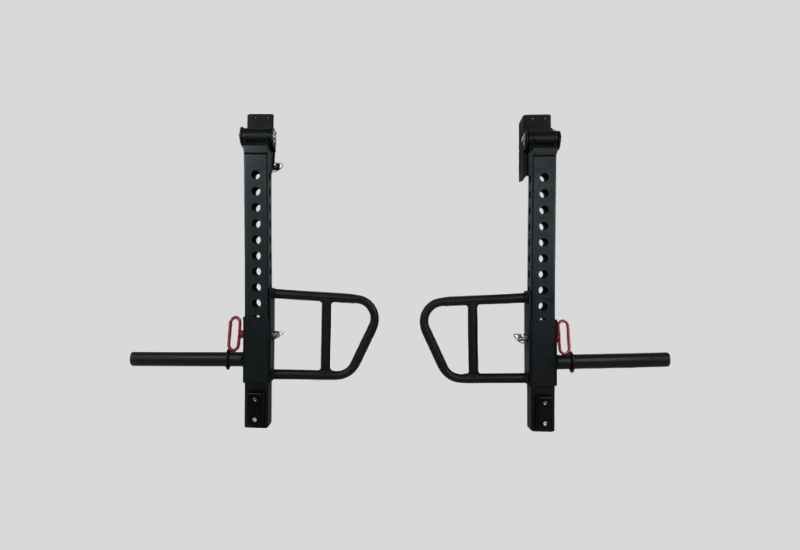
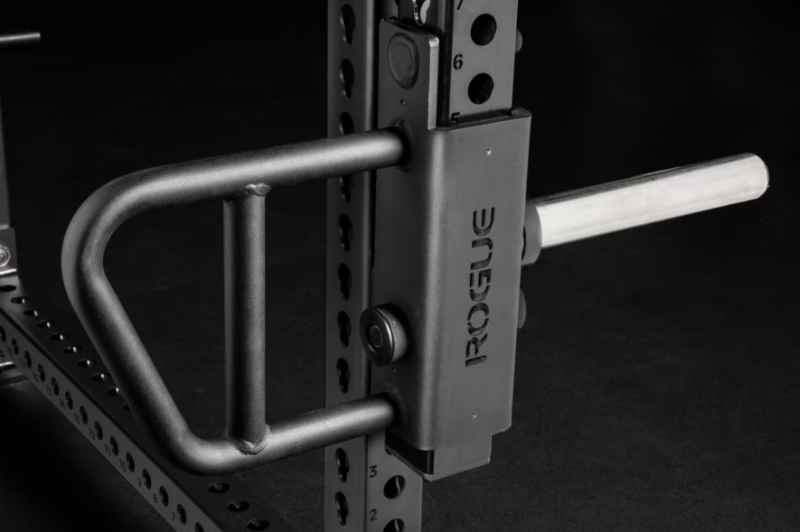
Lever arms, also called “jammer arms”, are an attachment that you can connect to your squat or power racks.
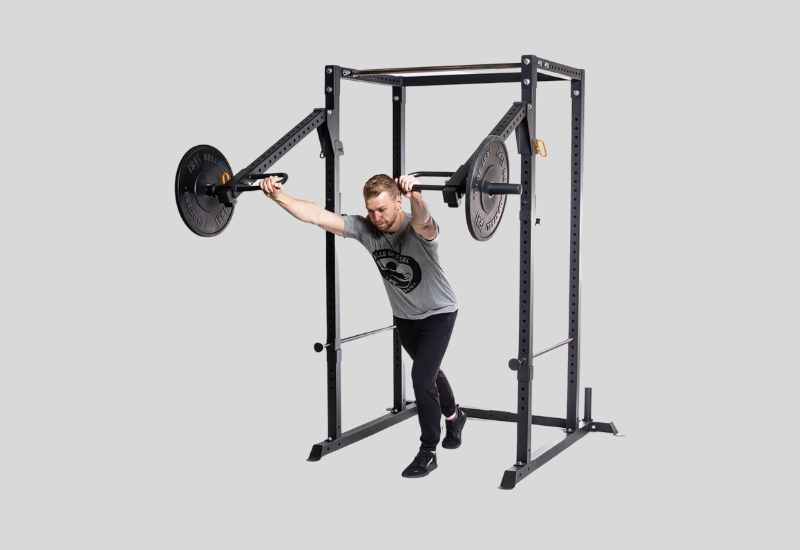
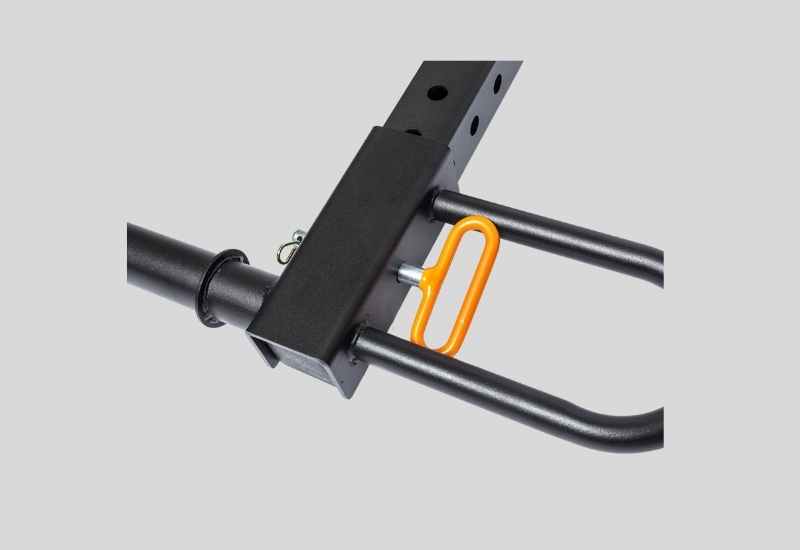
The arm secures to your squat rack (either bolted in place or using a moveable system), and allows you to load weight directly onto the arms.
When you lift, you’re not lifting straight up and down (like free weights), but you’re using the lever and fulcrum to change the load angle.
Benefits of Training with Lever Arms
Why would you train with lever arms? What makes them a good addition to (or replacement for) your typical free weight exercises?
? Change the angle
Like training with the landmine attachment, lever arms hit your muscles in new and interesting ways.
For example, with exercises like the bench press, you’re not lifting straight up and down (and loading the muscles directly), but working it more like a chest press machine pushing forward against the weight-loaded lever.
Ultimately, you’ll see the same amount of gains, but it will be a different way to train than your basic exercise.
? Less direct load
For those with wrist, shoulder, or elbow problems, lever arms can be game-changing because they take the load off your joints directly.
The squat rack is supporting the weight—you’re just pushing against it/lifting it, and while you still have the same amount of weight to lift, there’s less direct load that could strain or injure your joints.
? Versatile
With lever arms, you can do dozens more exercises with your squat rack or power rack. It can facilitate everything from chest presses to shoulder presses to rows to leg presses.
You’ll find it’s a great solution for making a standard piece of gym equipment incredibly versatile.
? Machine function using free weights
With lever arms, you can mimic pretty much any machine in your gym without actually buying/installing the machine.
ISO row? Yup. Bench press machine? Yessir. Machine deadlifts? Absolutely.
They’re an excellent add-on to any home gym with limited space, as you can use them the same way you would virtually every machine in a commercial gym.
Plenty of great reasons to consider adding lever arms to your squat rack or power rack, aren’t there?
Best Exercises You Can Do with Lever Arms
Exercise #1: Chest Press
Using the lever arms to do a chest press mimics the function of a chest press machine, taking the direct load off your joints while still shredding your pectoral muscles. It’s a great option to add into Chest Day!
To perform this exercise:
- Place a standard incline bench facing away from the squat rack.
- Set the lever arms so the handles are roughly chest height (or slightly below). Load the weight as designed.
- Sit, lean back against the bench, and grip the handles in both hands.
- Inhale through your nose, then exhale explosively as you push against the levers.
- Push until your arms are nearly at full extension (stop before your elbows lock out), and hold at the “top” of the chest press for a 1-count.
- Inhale as you lower the weight slowly and under control back toward your chest.
- Repeat as desired.
Exercise #2: Bent Over Rows
Bent over rows are a great way to train both your upper and lower back at the same time.
Thanks to the lever arms, you can still target your posterior chain muscles but there will be slightly less direct load on your lower back on the lowest point of the exercise, making it less likely to trigger lower back injuries.
To perform this exercise:
- Set the lever arm to roughly knee height. Load the weight as desired.
- Stand facing the squat rack with your feet spread roughly shoulder width apart.
- Bend over to pick the handles up. Keep your spine neutral and your knees slightly soft. DO NOT lock out your knees.
- Row the handles up toward your chest, keeping your elbows as close to your sides as possible.
- Lower slowly and under control back to the starting point, and pause for a 1-count before rowing once more.
- Repeat as desired.
Exercise #3: Belt Squats
Belt squats load up your legs like a boss but take all the weight off your lower back, making it much safer for those training heavy after a back injury.
See also: The Best Belt Squat Machines for Home Gyms
You’ll also improve your lower body posture and form through the squat, which can translate to far better performance in all squats (front, back, sumo, etc.).
To perform this exercise:
- Set the lever arm to roughly knee height. Load the weight as desired.
- Stand facing the squat rack with your feet spread roughly shoulder width apart. Secure a dip belt to the lever arms.
- Inhale, then bend your legs to lower slowly into a squat.
- Descend until your thighs are roughly parallel to the ground and your knees are bent at a 90-degree angle.
- Exhale explosively as you push back up to standing position.
- Pause at the top for a 1-count, readjust your feet/posture as needed.
- Repeat as desired.
Exercise #4: Leg Presses
Leg presses are an amazing option for lifting heavy without placing a heavy load directly on your back.
Because you’re lying on your back (or, in the case of this exercise, seated on a bench), your lower back is supported and your legs end up doing all the work.
Leg presses are more of an isolation exercise than squats, but you’ll find they’re still an excellent option for lifting heavy and increasing your 1-Rep Max.
Targeting your quads using leg presses can help you to gain power that ultimately will translate into better squat performance.
(Plus, a dedicated leg press machine is crazy expensive and takes up a lot of floor space… lever arms, not so much!)
To perform this exercise:
- Set the lever arm to roughly waist height. Load the weight as desired.
- Place a standard incline bench inside the squat cage. Use a barbell, board, or handle to connect the two lever arms.
- Lift your feet and brace them against the connected lever arms.
- Inhale, squeeze your core, and exhale explosively as you press against the weight.
- Push until your legs are nearly fully extended—stop just before your knees lock out—and pause at the top for a 1-count to maximize quad engagement.
- Inhale as you lower the weight slowly and under control back toward your starting point.
- Pause for a 1-count at the bottom.
- Repeat as desired.
Exercise #5: Seated Shoulder Press
Shoulder presses are one of the best exercises to target your anterior, middle, and posterior deltoid, the three deltoid muscles that give you broad, well-defined shoulders.
Using the lever arms, there will be far less weight loaded directly on the shoulder joints, drastically reducing your risk of shoulder impingement or injury.
It’s just a safer, smarter alternative to free weights that will help you to target your shoulder muscles using a squat rack.
To perform this exercise:
- Set the lever arm to roughly waist height. Load the weight as desired.
- Sit on an upright bench facing the squat rack, and grip the handles at roughly shoulder height.
- Inhale, then exhale explosively as you press upwards. Lift until your arms are nearly fully extended—stop before your elbows lock out—and hold at the top for a 1-count to engage your shoulder muscles.
- Inhale as you lower slowly back down to shoulder level. Stop when you feel resistance/tension in your shoulders.
- Pause at the bottom for a 1-count.
- Repeat as desired.
Exercise #6: Shrugs
Shrugs are one of the few exercises that specifically target your traps, the large muscles alongside your neck.
You can perform them using a standard barbell, but you may find that the weight pulls you forward and increases tension in your lower back.
Using the lever arms, however, you can hold the weight directly at your sides, making it less lower back-focused and targeting your shoulders specifically.
It’s a much better, smart option for training shrugs!
To perform this exercise:
- Set the lever arm to roughly waist height. Load the weight as desired.
- Stand facing the squat rack with your feet spread roughly shoulder width apart. Grip the handles and hold the weight comfortably by your side.
- Inhale, then exhale explosively as you shrug your shoulders upward. Picture yourself trying to touch your shoulders to your ears. Bend your arms slightly as you shrug to increase engagement of the traps.
- Lower slowly and under control until your arms are once more hanging by your side.
- Repeat as desired.
Exercise #7: Glute Kickbacks
Yes, that’s right: you can use the lever arms to train your glutes!
Just like you turned it into a leg press machine, you can turn the lever arms into a glute kickback machine that will let you add weight directly onto your glutes.
It’s a true game-changer for building that serious booty!
To perform this exercise:
- Set the lever arm to roughly waist height. Load the weight as desired. Use a barbell, wooden board, or extension to connect the two handles.
- Get on your hands and knees facing away from the lever arms. Position yourself so you can place the bottom of your right foot against the underside of the bar.
- Inhale, then exhale explosively as you kick your right foot back and up, pushing against the bar. Raise your leg as high into the air as you can, paying attention to your glutes to truly feel the squeeze.
- Lower the weight slowly and under control, inhaling as you do so.
- Repeat as desired on the right leg, then switch to the left leg for an equal number of repetitions.
Exercise #8: Standing Calf Raises
You don’t need a calf raise machine if you’ve got a squat cage with lever arms.
The lever arm attachment totally replaces the need for a calf raise machine and does the exact same job, helping you to target the calf muscles that are so critical for nearly every sport or fitness activity—from snowboarding to running to climbing.
To perform this exercise:
- Set the lever arm to roughly shoulder height. Load the weight as desired.
- Stand facing the squat rack with your feet spread roughly shoulder width apart. Stand on a block, weight disc, or platform that elevates you feet at least 2 inches off the ground. Slide your feet backward so your heels are hanging off the edge and only your forefoot is on the platform.
- Rest the weight on your shoulders or grip the handles at your sides, whatever feels more comfortable for you.
- Press up onto your tiptoes to engage the calf muscles.
- Lower your body so your heels are nearly touching the floor.
- Repeat as desired.
What Squat Rack Brands Offer Lever Arms?
Many of the top squat rack brands offer lever arms among their collection of attachments for squat and power racks.
They include:
Rogue Fitness – Monster LT-1 Cal Trolly and Lever Arm 2.0 ($1,170)
Bells of Steel – BoS Adjustable Lever Arms ($259)
REP Fitness – ISO Arms (4000 and 5000 models) ($730)
Body-Solid – Body-Solid Hammer Arms ($339)
Titan Fitness – T-3 Series Adjustable Lever Arms ($294)
The Bottom Line
As you’ve seen here, lever arms are incredibly versatile and can be used for a huge number of exercises.
Best of all, they mimic the function of exercise machines without the need for the machines themselves, turning your squat rack into a Swiss army knife of exercises.
When comparing attachments for your rack, keep these exercises in mind when you browse past the lever arms that are built for your specific squat rack.
More Stuff Like This
How Much is a Squat Rack? (Cost of Every Kind of Rack). Squat racks are one of the best investments you can make for your lifting goals. Here’s a look at the cost of each type of squat rack, some of the hidden costs of buying a rack, and why they can be so expensive.
Westside Hole Spacing: What Is It, What are the Benefits, and the Squat Racks That Have It. One of the best features of a new squat rack is Westside hole spacing. Here’s a detailed dive into what Westside hole spacing is, where it started, the benefits, and which squat racks have it.
7 Types of Squat Racks for Your Home Gym. Getting ready to build your own ultimate home gym? Welp, that starts with choosing the right squat rack for your workout goals. Here is a breakdown of seven types of squat racks.
Do You Have to Bolt Down a Squat Rack? (Plus How to Do It and Alternatives for Anchoring Your Rack). Bolting down a squat rack is a guaranteed way to make lifting safer. Here’s why you should do it, how to do it, and some alternatives for anchoring your rack if you don’t want to bolt it down.